


How do I start designing my product?
To start designing your product, choose the product you want to customize, select your size and options, then open the online designer. From there, you can use a template, upload your own artwork, or create a design from scratch.
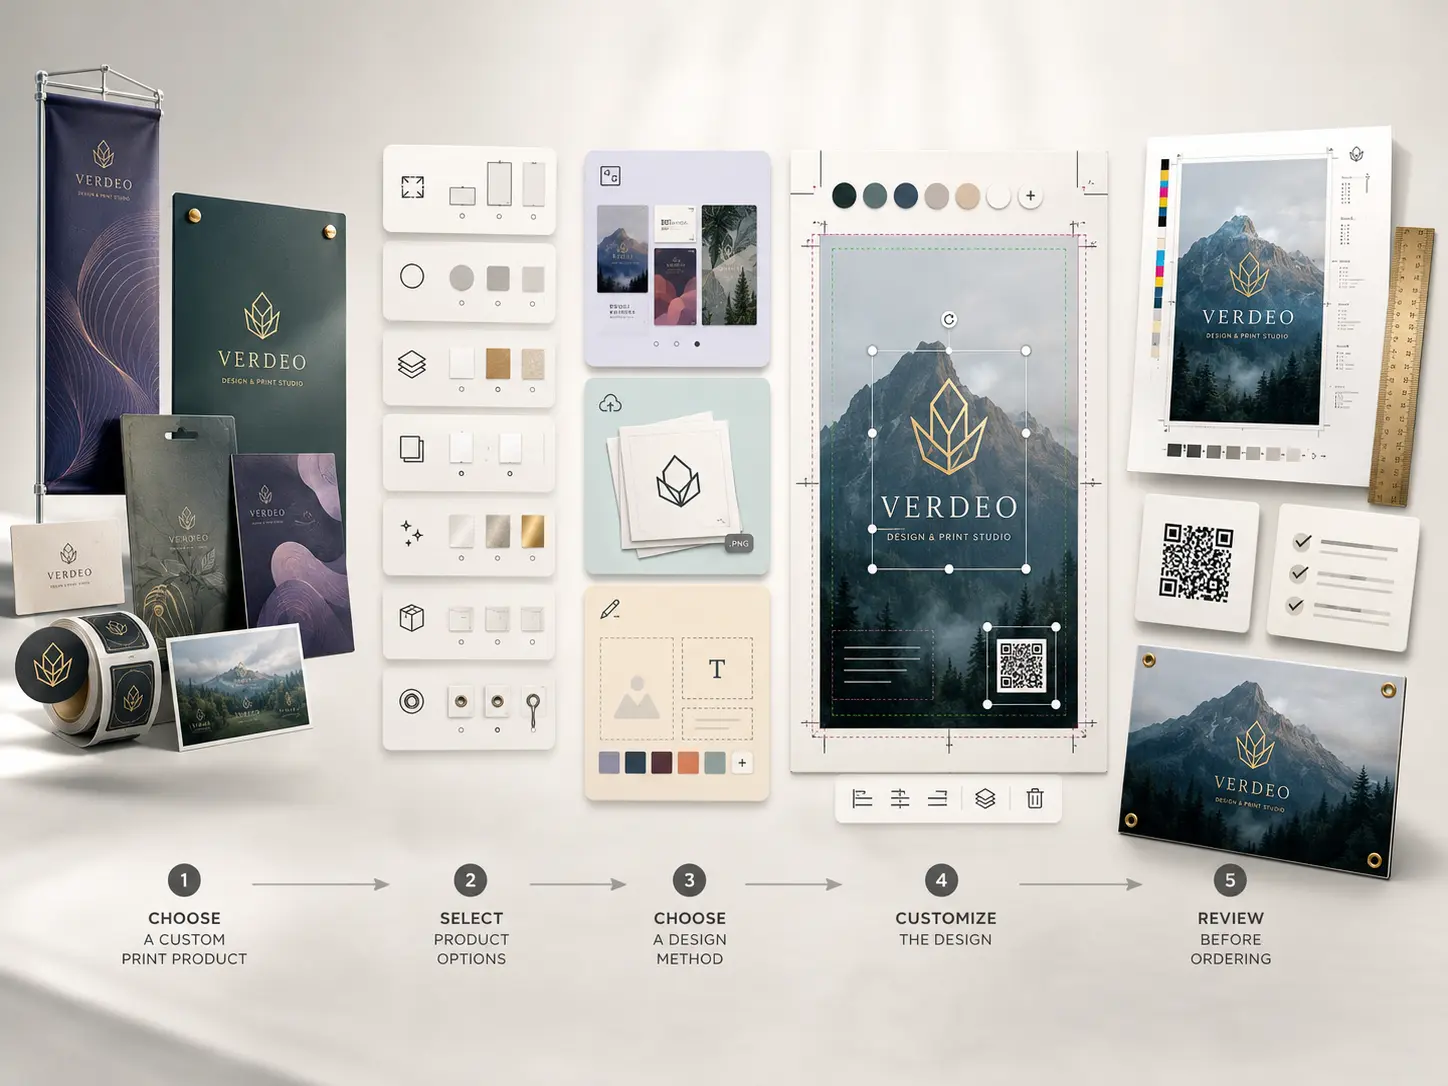
Step 1: Choose Your Product
Start by selecting the product you want to order. This could be a banner, sign, business card, sticker, label, packaging item, or another custom print product.
Before opening the designer, review the available options, such as:
- Size
- Shape
- Material
- Print side
- Finish
- Quantity
- Hardware or accessories, if available
These options may affect how your design should be set up.
Step 2: Choose How You Want to Design
Once you enter the design process, you can usually choose from three main options:
Use a template
Best if you want a quick starting point with a ready-made layout.
Upload your own artwork
Best if you already have a completed design file, logo, image, or brand artwork.
Create your own design online
Best if you want to build a custom layout using text, images, colors, and design elements.
Step 3: Customize Your Design
In the online designer, you can edit text, upload images, move elements, adjust colors, and preview your product before ordering.
Make sure to check all important details before adding the product to your cart.
Step 4: Review Before Ordering
Before placing your order, review:
- Spelling and grammar
- Contact information
- Image clarity
- Text size
- Bleed and safe area
- QR code readability
- Product size and orientation